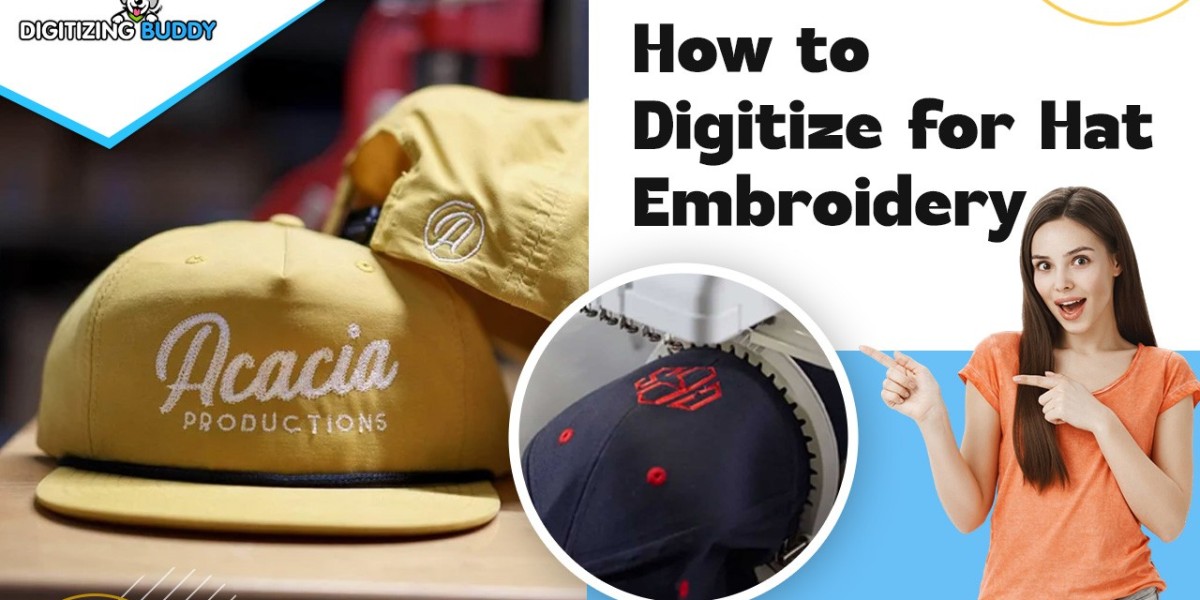
If you're into custom hat designs, you already know that embroidery can take your creations from basic to next-level. But here’s the thing—great embroidery starts long before the needle hits the fabric. It begins with proper digitizing.
A lot of people think embroidery is just about picking a cool design and letting the machine do its thing. But if your design isn’t digitized correctly, you’ll end up with messy stitches, puckering fabric, or worse—a design that just doesn’t look right on a curved, structured surface like a hat.
So, how do you make sure your hat embroidery digitizing looks crisp, professional, and lasts through countless wears? It all comes down to smart digitizing. Let’s break it down.
Why Hat Embroidery Digitizing Is Different
Hats aren’t flat like t-shirts or patches. They have curves, seams, and stiff fabric—usually a blend of cotton, polyester, or wool. That means a design that looks great on a flat canvas might turn into a distorted mess on a cap.
Here’s what makes hat embroidery tricky:
- Limited Space: Hats have a small embroidery area (usually the front panel), so designs need to be scaled properly.
- Curved Surface: Unlike flat fabrics, hats require adjustments for the arch of the brim and crown.
- Stiff Material: Most hats use thicker material, which means stitch density and underlay need extra attention.
If your digitizing doesn’t account for these factors, you’ll end up with designs that look stretched, uneven, or just plain sloppy.
Key Steps for Flawless Hat Embroidery Digitizing
1. Start with the Right File Format
Not all digital files work for embroidery. Vector files (like .AI or .EPS) are best because they allow clean scaling without losing quality. If you’re working with a raster image (like a JPEG or PNG), you’ll need to vectorize it first.
2. Simplify the Design
Hats have limited space, so intricate details can get lost or turn into a blur of thread. Simplify complex logos by:
- Reducing small text (anything under 0.2 inches tall is risky).
- Using bold, clean lines instead of ultra-thin ones.
- Avoiding excessive gradients—solid fills or satin stitches work better.
3. Adjust for the Hat’s Curve
Flat designs don’t translate well to curved surfaces. A good digitizer will:
- Warp the design slightly to compensate for the hat’s shape.
- Keep the center aligned so the design doesn’t look crooked when worn.
- Avoid large, solid fills—they can cause puckering on stiff hat material.
4. Optimize Stitch Types
Not all stitches work the same on hats. Here’s what to consider:
- Satin stitches (column stitches) work great for text and borders.
- Fill stitches should be used sparingly—too much density can make the hat stiff.
- Underlay stitches are crucial—they stabilize the fabric before the top stitches go in.
5. Test on a Sample Hat
Never skip this step. Stitch out your design on a spare hat (or similar fabric) to check for:
- Puckering (if the fabric wrinkles, reduce stitch density).
- Gaps or misalignment (adjust the digitizing file if needed).
- Thread tension issues (some machines need tweaking for thicker fabrics).
Common Hat Embroidery Mistakes (And How to Avoid Them)
Even experienced embroiderers run into these problems. Here’s how to dodge them:
Mistake #1: Ignoring Fabric Type
A baseball cap and a beanie need different digitizing approaches. Thicker materials (like wool or structured cotton) require lower stitch density to prevent stiffness.
Fix: Adjust stitch count based on the hat’s material before digitizing.
Mistake #2: Overcrowding the Design
Trying to fit too much into a small space lead to a cluttered, unreadable mess.
Fix: Stick to one focal point—a logo, simple text, or a bold icon works best.
Mistake #3: Skipping the Hooping Test
If the hat isn’t hooped tightly, the design can shift during stitching.
Fix: Use a cap hoop or specialized jig to keep the fabric secure.
Tools & Software for Better Hat Digitizing
You don’t need expensive software to get great results, but having the right tools helps. Here are some top options:
- Wilcom EmbroideryStudio (Professional-grade, but pricey).
- Hatch Embroidery (Great for beginners and mid-level digitizers).
- Ink/Stitch (Free, open-source option for those on a budget).
If you’re outsourcing, look for digitizers who specialize in hat embroidery—they’ll know how to adjust for curves and stiff fabrics.
Final Tip: Less Is More
The best hat designs are clean, bold, and easy to read from a distance. Don’t overcomplicate it. A well-digitized, simple design will always look sharper than a crowded, overly detailed one.
Ready to Upgrade Your Hat Game?
Great embroidery starts with great digitizing. Whether you’re doing it yourself or working with a pro, paying attention to these details will make your hat designs stand out. No more wonky lettering, puckered fabric, or faded details—just crisp, professional embroidery that holds up wash after wash.
Now, go stitch something awesome!